Advertisement
Quick Links
thank you for purchasing a sealey product. manufactured to a high standard, this product will, if used according to these
instructions, and properly maintained, give you years of trouble free performance.
IMPORTANT: PLEASE READ THESE INSTRUCTIONS CAREFULLY. NOTE THE SAFE OPERATIONAL REQUIREMENTS, WARNINGS & CAUTIONS. USE
THE PRODUCT CORRECTLY AND WITH CARE FOR THE PURPOSE FOR WHICH IT IS INTENDED. FAILURE TO DO SO MAY CAUSE DAMAGE AND/OR
PERSONAL INJURY AND WILL INVALIDATE THE WARRANTY. KEEP THESE INSTRUCTIONS SAFE FOR FUTURE USE.
refer to
Wear eye
instructions
protection
1. safety
1.1.
electrical safety
warninG! it is the user's responsibility to check the following:
‰
check all electrical equipment and appliances to ensure that they are safe before using. inspect power supply leads, plugs and
all electrical connections for wear and damage. sealey recommend that an rcd (residual current device) is used with all electrical
products. You may obtain an rcd by contacting your local sealey dealer.
if the used in the course of business duties, it must be maintained in a safe condition and routinely PAt (Portable Appliance test)
tested.
electrical safety information, it is important that the following information is read and understood.
ensure that the insulation on all cables and on the appliance is safe before connecting it to the power supply.
9
regularly inspect power supply cables and plugs for wear or damage and check all connections to ensure that they are secure.
9
Ensure that the voltage rating on the appliance suits the power supply to be used and that the plug is fitted with the correct fuse - see
9
fuse rating in these instructions.
do not pull or carry the appliance by the power cable.
8
do not pull the plug from the socket by the cable. Remove the plug from the socket by maintaining a firm grip on the plug.
8
do not use worn or damaged cables, plugs or connectors. ensure that any faulty item is repaired or replaced immediately by a
8
qualified electrician.
This product is fitted with a BS1363/A 13 Amp 3 pin plug.
if the cable or plug is damaged during use, switch the electricity supply and remove from use.
Replace a damaged plug with a BS1363/A 13 Amp 3 pin plug. If in doubt contact a qualified electrician.
class ii products are wired with live (brown) and neutral (blue) only are marked with the class ii symbol;
A) Connect the BROWN live wire to the live terminal 'L'.
B) Connect the BLUE neutral wire to the neutral terminal 'N'.
c) After wiring, check that there are no bare wires and ensure that all wires have been correctly connected.
ensure that the cable outer sheath extends inside the cable restraint and that the restraint is tight.
9
do not connect either wire to the earth terminal.
8
Sealey recommend that repairs are carried out by a qualified electrician.
1.2.
General safety
follow all workshop safety rules, regulations and conditions when using the wrench.
9
remove the battery pack from the wrench before servicing or performing any maintenance.
9
maintain the wrench and battery pack in good condition.
9
replace or repair damaged parts. use an authorised service agent and recommended parts only. unauthorised parts may be
9
dangerous and will invalidate the warranty.
Ensure the wrench is in 'neutral' before installing the battery pack.
9
Keep the wrench, battery pack and charger clean for optimum performance.
9
Keep the work area clean and tidy and free from unrelated materials. ensure that there is adequate lighting.
9
Ensure that battery pack is correctly fitted to the wrench handle and latched in place before operating wrench.
9
warninG! When working around vehicle brake systems we recommend that you wear suitable respiratory protection due to the
‰
possible presence of asbestos dust from brake linings.
Use only impact sockets which are specifically designed for use with an impact wrench.
9
Avoid unintentional starting.
9
Hold the wrench securely before pressing the trigger; considerable torque reaction is generated upon starting.
9
Wear approved safety eye/face shield, ear defenders and hand protection.
9
Remove ill-fitting clothing. Remove ties, watches, rings and other loose jewellery and contain long hair.
9
Maintain correct balance and footing. Ensure the floor is not slippery and wear non-slip shoes.
9
Keep children and unauthorised persons away from the work area.
9
do not operate the wrench if any parts are missing as this may cause failure and/or personal injury.
8
© Jack sealey limited
instructions for
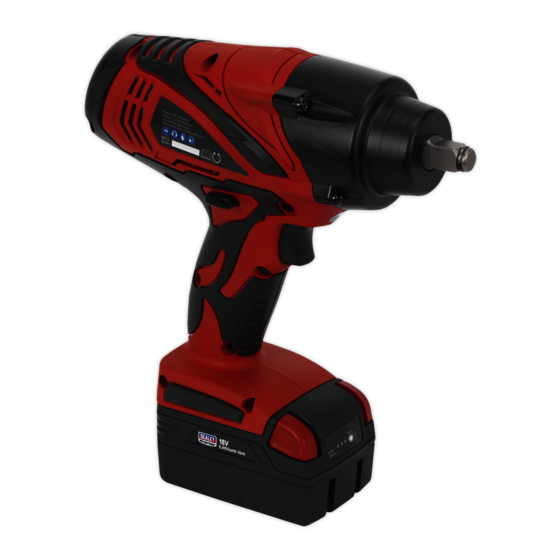
cordless lithium-ion impact wrench
18v 4ah 1/2" sq drive 650nm- 2 batteries
model no:
Wear protective
Wear ear
gloves
protection
Original Language Version
cp3005.v2
Wear dust
mask
recommended fuse rating
3 Amp
cP3005.V2 | Issue 3 08/03/17
Advertisement

Summary of Contents for Sealey CP3005.V2
- Page 1 IMPORTANT: PLEASE READ THESE INSTRUCTIONS CAREFULLY. NOTE THE SAFE OPERATIONAL REQUIREMENTS, WARNINGS & CAUTIONS. USE THE PRODUCT CORRECTLY AND WITH CARE FOR THE PURPOSE FOR WHICH IT IS INTENDED.
- Page 2 1 ..................Anvil 2 ................Anvil collar 3 ..............LED Worklight 4 ..................trigger 5 ............Forward/Reverse Selector 6 .................Battery Pack 7 ............Battery Release Buttons 8 ............charge indicator Panel Original Language Version cP3005.V2 | Issue 3 08/03/17 © Jack sealey limited...
- Page 3 The wrench has a charge indicator panel (fig.1.8) with three charge level LEDs. The charge levels are as follows: Green, amber, red: above 70% charged Amber, red: between 70% and 30% Red only: Less than 30% charged, requires recharging (see 4.3. above) Original Language Version cP3005.V2 | Issue 3 08/03/17 © Jack sealey limited...
- Page 4 If, when the trigger is pressed, the LED flashes 5 times, an overheat has been detected. Allow the unit to cool before further use. The LED flashing 7 times denotes an over-current fault. In this event, the unit should be returned to either a Sealey stockist or service agent.


