Advertisement
Dear customer
Thank you for purchasing this product.
Before connecting, operating or adjusting this product, please read
these instructions completely.
Please keep this manual for future reference.
Table of contents
.................................................................................
.....................................................................
.................................................................................
.........................................................................................
................................................................................................
.....................................................................
.............................................................................
.............................................................
.................................................................................
..............................................................................
Supplied accessories
Check the packaging for these accessories.
1 AC power supply cord
Note
The included AC power supply cord is for use with this unit only.
Do not use it with other equipment.
GC GU GS
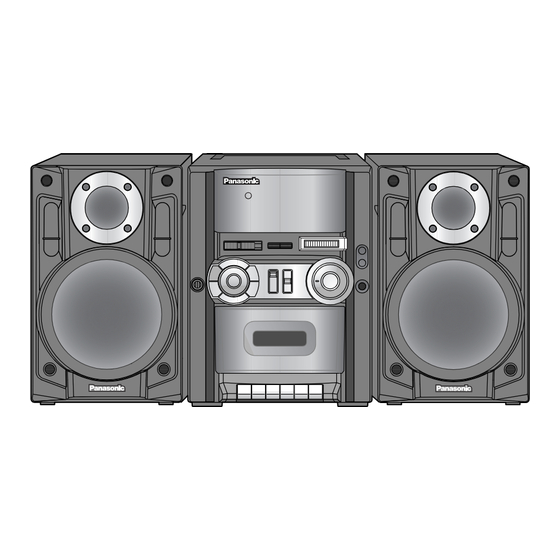
Portable Stereo Component System
3
4
5
6
7
8
9
10
11
11
Operating Instructions
RX-CS40
Model No.
RQT7635-G
Advertisement
Table of Contents

Summary of Contents for Panasonic RX-CS40
-
Page 1: Table Of Contents
Portable Stereo Component System Operating Instructions RX-CS40 Model No. Dear customer Thank you for purchasing this product. Before connecting, operating or adjusting this product, please read these instructions completely. Please keep this manual for future reference. Table of contents Control guide ................. - Page 2 CAUTION: Change the voltage setting to suit the AC voltage in your area. See page 5. Note that the unit will be seriously damaged or fail to operate correctly if this setting is not made correctly. CAUTION! DO NOT INSTALL, OR PLACE THIS UNIT IN A BOOKCASE, BUILT-IN CABINET OR IN ANOTHER CONFINED SPACE.
-
Page 3: Control Guide
Control guide Speakers (Woofer) Speakers (Tweeter) Built-in microphone (MIC) Preset equalizer buttons Band selector (BAND) Operation/battery indicator (OPERATION/BATT) FM mode/beat proof selector (FM MODE/BP) Fine tuning control (FINE TUNING) Function selector (SELECTOR) Tuning control (TUNING) Volume control (VOLUME) Audio input terminal (CD/LINE IN) Headphones jack (PHONES) Cassette holder XBS adjustor (XBS) -
Page 4: Speaker Connection
Speaker connection Connect the speaker cords Attaching the speakers Detaching the speakers RELEASE RELEASE Before attaching or detaching the speakers, Be sure to disconnect the speaker cords. Be sure to set [SELECTOR] to “TAPE/ ”. OPR OFF • The function selector switch does not separate entire unit from mains even if in “TAPE/ ”... -
Page 5: Power Supply
Power supply AC power supply cord Batteries Car battery cord To household AC outlet AC power supply cord Set the voltage. Use a flat-head screw-driver to turn the voltage selector for the area in which the unit will be used. Connect the AC power supply cord (included). -
Page 6: The Radio
The radio To improve reception Follow steps 1 to 3. In step 1: “OPERATION/BATT” lights while the radio is on. In step 2: Select FM, MW, SW1 or SW2. To turn off the radio OPR OFF Set [SELECTOR] to “TAPE/ ”. -
Page 7: Tapes
Tapes Use normal position/TYPE I tape only. Follow steps 1 to 3. OPR OFF In step 1: Set to “TAPE/ ”. In step 2: Insert the tape with the side to be played facing out ( ) and close by hand. •... -
Page 8: Recording The Radio
Recording the radio Erasure prevention TUNING Side A Tab for Side A Tab for Side B FM MODE/BP STEREO/ MONO/ Use normal position/TYPE I tape only. Follow steps 1 to 3. In step 1: Set [SELECTOR] to “RADIO” and tune to the station. ( page 6) In step 2: Insert the tape inside with the side to be recorded facing out and close by hand. -
Page 9: Other Functions
Other functions Recording from an externally connected CD Recording through the Equalizer/ player etc. built-in microphone (MIC) Headphones CD player,etc. White (L) Red (R) Stereo connection cable Recording from an externally connected CD player etc. Connect the CD player (External equipment). Start recording, then start the CD playback. -
Page 10: Troubleshooting Guide
Troubleshooting guide Before requesting service, make the below checks. If you can’t fix the system as described below, or if something not listed here occurs, consult your dealer for instructions. Reference pages are shown as black circled numbers Common Problems Turn the volume up. -
Page 11: Maintenance
Maintenance If the surfaces are dirty To clean this unit, wipe with a soft, dry cloth. • Never use alcohol, paint thinner or benzine to clean this unit. • Before using chemically impregnated cloth, read the instructions that came with the cloth carefully. For a cleaner crisper sound Clean the heads regularly to assure good quality playback and recording. - Page 12 Matsushita Electric Industrial Co., Ltd. Web Site: http://www.panasonic.co.jp/global/ RQT7635-G M0104SF0...


