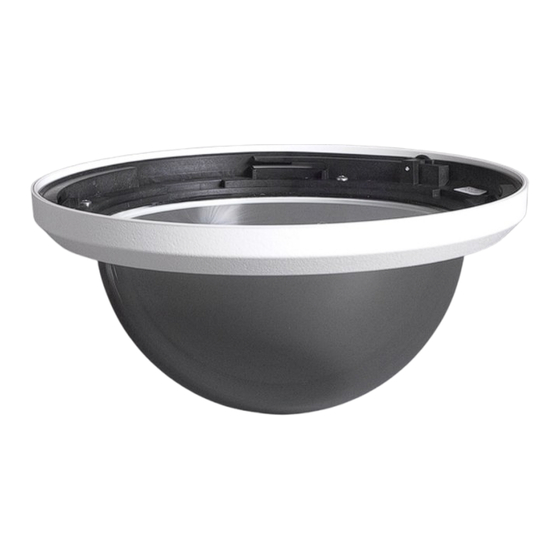
Bosch VG4 Installation Manual
Replacing a bubble
Hide thumbs
Also See for VG4:
- Installation manual (108 pages) ,
- Firmware update manual (42 pages) ,
- Manual (36 pages)
Table of Contents
Advertisement
Quick Links
Advertisement
Table of Contents

Summary of Contents for Bosch VG4
- Page 1 AUTODOME Bubble Replace- ment (VG4, VG5, or 7000 Ser- ies) VGA-BUBBLE│VGA-BUBHD...
- Page 2 Installation Manual...
-
Page 3: Table Of Contents
AUTODOME Bubble Replacement (VG4, VG5, Table of Contents | en or 7000 Series) Table of contents AUTODOME Bubble Replacement Unpacking Parts List Tools Required Bubble Handling and Cleaning Handling Cleaning 2.2.1 Cleaning the Bubble Interior 2.2.2 Cleaning the Bubble Exterior... -
Page 4: Autodome Bubble Replacement
AUTODOME Bubble Replacement This guide provides instructions for replacing a bubble on an AUTODOME camera (of VG4 Series, VG5 Series, or 7000 Series) with in-ceiling or pendant housing. The guide also includes important information about handling and cleaning the bubble. -
Page 5: Parts List
Tinted high-resolution VGA- Fits any small in-ceiling can for acrylic BUBBLE- the following models: VG4, CTIA VG5-1xx, VG5-6xx, 7000 Series. Clear rugged VGA- Bubble only; you must reuse the polycarbonate BUBBLE- rings that came with the unit. -
Page 6: Tools Required
| AUTODOME Bubble Replacement Replacement (VG4, VG5, or 7000 Series) Part Notes Numbers Fits any small in-ceiling can for Tinted HD high-resolution VGA-BUBHD- the following models: VG4, acrylic CTIA VG5-1xx, VG5-6xx, 7000 Series. Pendant Bubbles Clear high-resolution VGA- Bubble only acrylic... -
Page 7: Bubble Handling And Cleaning
AUTODOME Bubble Replacement (VG4, VG5, Bubble Handling and Cleaning | en or 7000 Series) Bubble Handling and Cleaning Rugged polycarbonate or high-resolution acrylic replacement bubbles require special care when handling and cleaning to avoid scratches. Warning! High-resolution acrylic bubbles are not permitted to be used with a Pressurized Environmental Housing. -
Page 8: Cleaning The Bubble Exterior
Never scrub the bubble with any abrasive material or cleaners. – Do use the Bosch recommended NOVUS No. 1 Plastic Clean & Shine (or equivalent), according to manufacturer’s instructions. Do Not: –... -
Page 9: Replacing An Autodome Bubble
AUTODOME Bubble Replacement (VG4, VG5, Replacing an AUTODOME Bubble | en or 7000 Series) Replacing an AUTODOME Bubble The following table identifies the bubbles that are compatible with models of AUTODOME in-ceiling cameras. Customer’s Camera Desired Type of Bubble Part... - Page 10 AUTODOME Bubble en | Replacing an AUTODOME Bubble Replacement (VG4, VG5, or 7000 Series) Tinted rugged VGA- 3. Bubble polycarbonate BUBBLE- only; if you CTIR have a clear bubble but want to use a tinted one, you must reuse the...
- Page 11 AUTODOME Bubble Replacement (VG4, VG5, Replacing an AUTODOME Bubble | en or 7000 Series) (VG5-7xx-). Tinted high-resolution VGA- Fits large in- acrylic BUBLRG- ceiling can. CTIA Clear high-resolution VGA- acrylic BUBBLE- (Included with PAL CCLA 1. (See camera models.) above.)
- Page 12 AUTODOME Bubble en | Replacing an AUTODOME Bubble Replacement (VG4, VG5, or 7000 Series) 1 Previous version of bubble with polycarbonate rings 2 HD bubble 3 New version of bubble with polycarbonate rings The following table identifies the bubbles that are compatible with models of AUTODOME pendant cameras.
-
Page 13: Replacing An In-Ceiling Rugged Polycarbonate Bubble
Polycarbonate Bubble Notice! The following instructions are for bubbles VGA-BUBBLE-CCLR and VGA-BUBBLE-CTIR (on AUTODOME models VG4, VG5-1xx, and VG5-6xx). Loosen the lockscrew (item 1, below) in the trim ring using a P1 or smaller Phillips screwdriver until the bubble can rotate freely. - Page 14 AUTODOME Bubble en | Replacing an AUTODOME Bubble Replacement (VG4, VG5, or 7000 Series) Turn the bubble and trim ring assembly over so that you see the inside of the assembly. Remove the four Phillips screws (item 2 below), using a P1 Phillips screwdriver, that connect the bubble to the trim ring and set aside for later use.
-
Page 15: Replacing An In-Ceiling Acrylic Bubble
AUTODOME Bubble Replacement (VG4, VG5, Replacing an AUTODOME Bubble | en or 7000 Series) Replacing an In-ceiling Acrylic Bubble Notice! The following instructions are for bubbles VGA-BUBBLE-CCLA and VGA-BUBBLE-CTIA. These bubbles come assembled with a white trim ring. An optional black trim ring is supplied. To replace the white trim ring, follow steps 3 –... -
Page 16: Replacing An In-Ceiling Hd Acrylic Bubble
AUTODOME Bubble en | Replacing an AUTODOME Bubble Replacement (VG4, VG5, or 7000 Series) Clean the bubble according to the instructions in Cleaning, page 7. Place the replacement bubble onto the in-ceiling housing, and rotate it clockwise approximately 1/4 turn until it stops. -
Page 17: Replacing A Pendant Bubble
AUTODOME Bubble Replacement (VG4, VG5, Replacing an AUTODOME Bubble | en or 7000 Series) Warning! Trim ring can become deformed If the trim ring is not turned completely, the screw slot on the trim ring will not be aligned with the screw slot in the housing. - Page 18 AUTODOME Bubble en | Replacing an AUTODOME Bubble Replacement (VG4, VG5, or 7000 Series) Remove the bubble from the trim ring. Insert the replacement bubble inside the trim ring and align the release tab (item 2, above) on the trim ring with the release slot on the bubble.
- Page 20 Bosch Security Systems, Inc. 850 Greenfield Road Lancaster, PA, 17601 www.boschsecurity.com © Bosch Security Systems, Inc., 2013...


